ASCII Image Renderer 🖼️

We will be building a simple ASCII image renderer.
What is ASCII?
ASCII (American Standard Code for Information Interchange) is a data-encoding format for electronic computer communication. ASCII assigns standard numeric values to letters, numerals, punctuation marks, and other computer characters.
Understanding what an image is
An image is a collection of pixels, each pixel can hold a color value in the RGB format.
RED ->      (255, 0, 0)
GREEN ->    (0, 255, 0)
BLUE ->     (0, 0, 255)
BLACK ->    (0, 0, 0)
WHITE ->    (255, 255, 255)
We create different colors by blending red, green, and blue, with each color's value ranging from 02550255
My Approach
To render each pixel in a terminal, we need to calculate the color of each pixel. Instead of using colors, we will render the image in black and white.
We have to determine the brightness of each pixel, which can range from the darkest (0, 0, 0)(255, 255, 255)
brightness = int((R + G + B) / 3)
Once we have the brightness of each pixel, we will represent each brightness value using specific characters. These characters will reflect the brightness values, ranging from dark to light.
PIXELS = ".'`^\",:;Il!i><~+_-?][}{1)(|\/tfjrxnuvczXYUJCLQ0OZmwqpdbkhao*#MW&8%B@$"
For example, we use a period .$

Rendering the Image
I will render the images in a manner similar to a printer, row by row. This involves looping through each pixel of an image, mapping the pixel to a character, and adding a line break based on the width of the image. For this project, I am using Python and processing each image with the pillow package.
from PIL import Image

PIXELS = ".'`^\",:;Il!i><~+_-?][}{1)(|\/tfjrxnuvczXYUJCLQ0OZmwqpdbkhao*#MW&8%B@$"

img = Image.open(image_path).convert("RGB")
width, height = img.size

pixels = img.load()
pixel_art = ""
for y in range(height):
    for x in range(width):
        R, G, B = pixels[x, y]
        # calculating greyscale value (Average method)
        brightness = (R + G + B) // 3
        pixel_index = int(((brightness) / 255) * len(PIXELS))
        # making sure the pixel index is within the range of PIXELS
        pixel_index = min(pixel_index, len(PIXELS) - 1)
        pixel_art += PIXELS[pixel_index]
    # render each line
    pixel_art += "\n"
print(pixel_art)
Considering terminal width
In the same way that images appear differently based on the screen resolution, we also want to adjust how images are displayed based on the width of the terminal. If the number of pixels or characters per row is greater than the terminal's width, each line will break, causing the image to not render as expected. To address this, we need to compress each image so that it has a maximum width equal to the size of the active terminal. We don't need to worry about the height, as users can simply scroll to view the entire image.
import os

TERMINAL_WIDTH = os.get_terminal_size().columns

img = Image.open(image_path).convert("RGB")
width, height = img.size
image_ratio = width / height

resized_width = int(TERMINAL_WIDTH * coverage)
if width > resized_width:
    img = img.resize((resized_width, int(resized_width / image_ratio)))
    width, height = img.size
Where coverage01
Issue with terminal font
The image appears stretched vertically because of the font size relative to the line height. To resolve this, we will double the number of pixels or characters per row to achieve a better approximation. Additionally, we still need to consider the width of the terminal.
PIXEL_WIDTH_MULTIPLIER = 2
resized_width = int(TERMINAL_WIDTH * coverage * 1 / PIXEL_WIDTH_MULTIPLIER)
Within the for
pixel_art += PIXELS[pixel_index] * PIXEL_WIDTH_MULTIPLIER
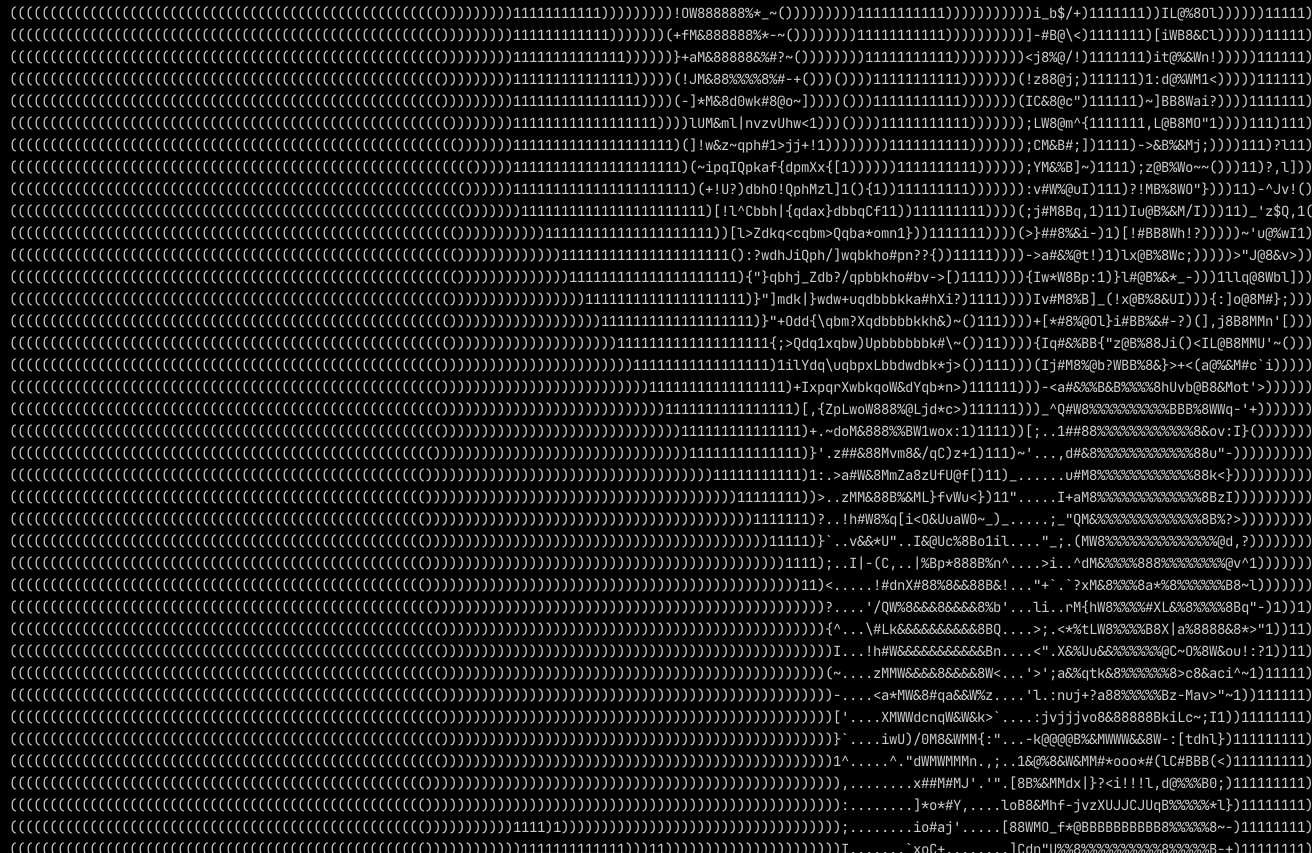
Result
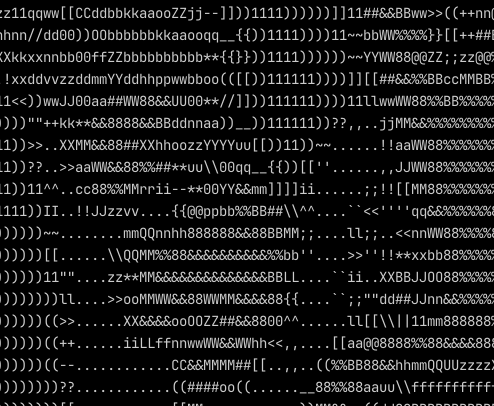
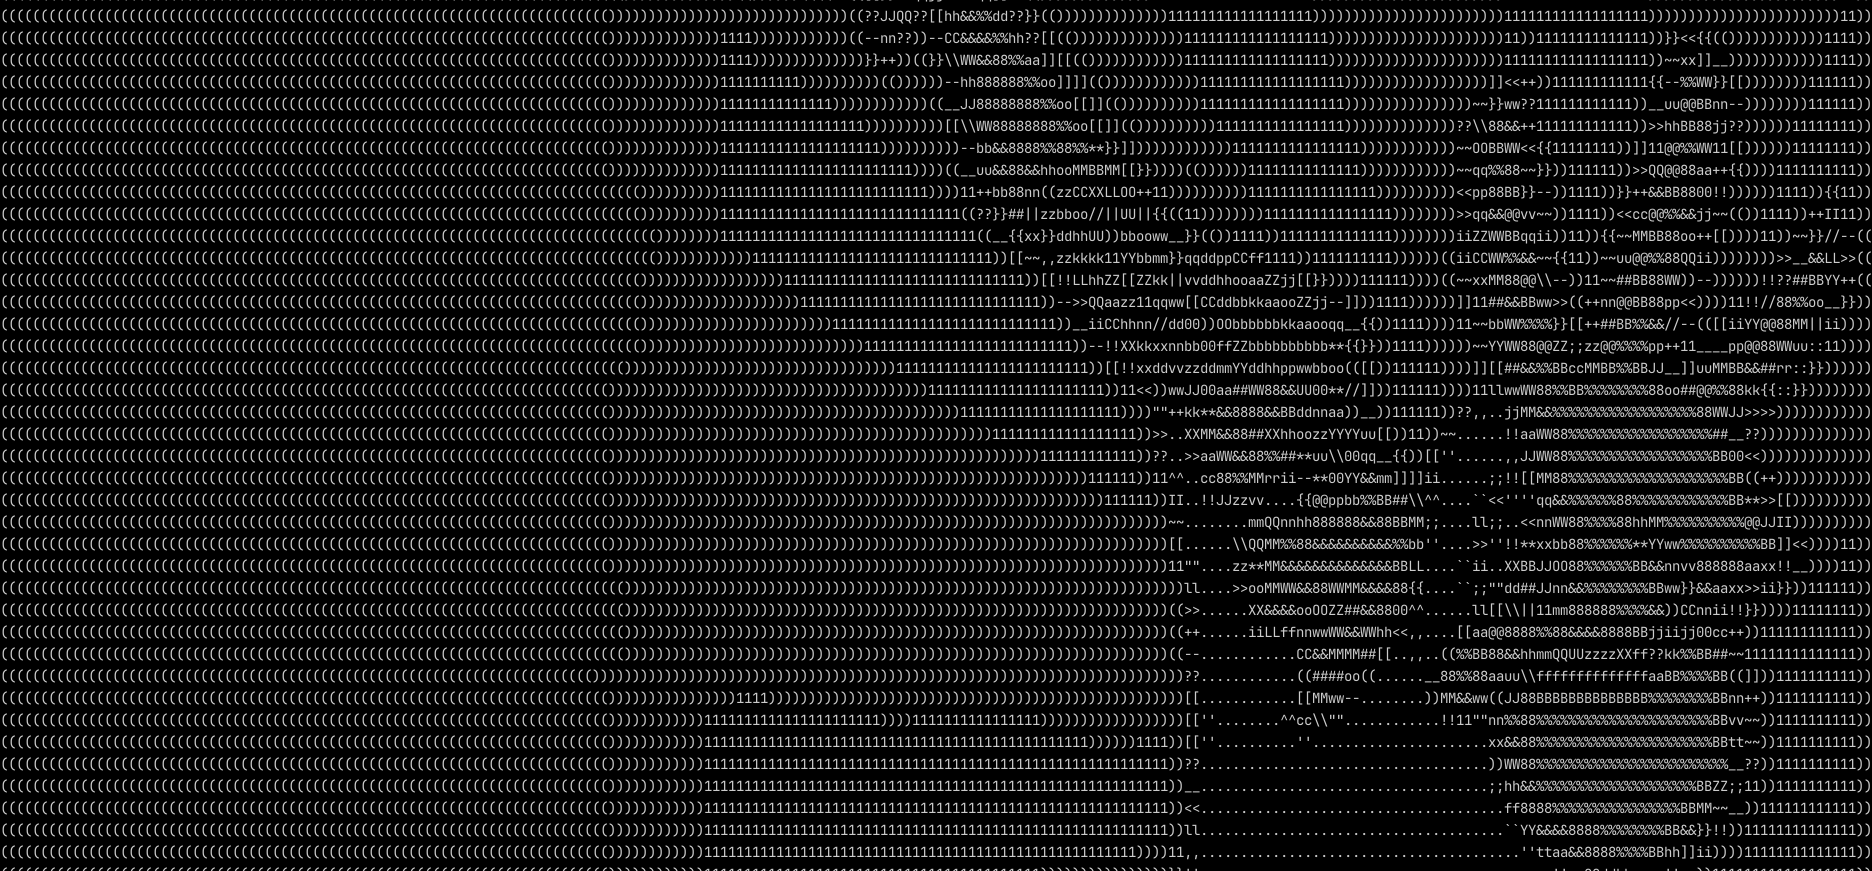 When you have a closer look you'll see each unique character that combine to form the image.
Conclusion
This project was relatively easy to do and helps to understand how images work. It's fascinating to see how everything can be represented numerically. That's why I enjoy working with microcontrollers and sensors because we're essentially converting signals and physical properties into something we can work with numerically. Once we have those numbers, we can build just about anything!